
You’ve installed Aurora and activated it. Your site is live with the theme running, but it doesn’t quite look like the demo yet. The layouts are there, the structure is right, but something feels unfinished.
That’s normal, and it’s not a problem with the theme. Aurora ships ready to go, but like any well-built theme, it needs a few things from you before it can look its best. These are not complicated steps. Most take under two minutes each. Work through them in order and your site will look the way you imagined it when you chose Aurora in the first place.

1. Decide how your homepage works
This is the first thing to sort because it affects everything else. WordPress gives you two options for your homepage: show your latest posts automatically, or set a specific static page as your homepage.
Aurora works with both, but you need to make a deliberate choice rather than leaving WordPress on its default.
If you want your homepage to display your blog posts directly, go to Settings, then Reading, and make sure ‘Your latest posts‘ is selected. Aurora’s homepage layouts will take over from there and present your posts using whichever homepage style you choose in the Customizer.
If you want a static page as your homepage (useful if you want a landing-page style home with a specific layout), create a blank page in WordPress, give it a title like ‘Home,’ and then go to Settings, then Reading, and set it as your static front page. Then create a second page titled ‘Blog’ or ‘Posts’ and assign it as your posts page. Aurora will use that page to display your archive of posts.
Getting this right first means every other Customizer setting you touch afterwards will show up exactly where you expect it.
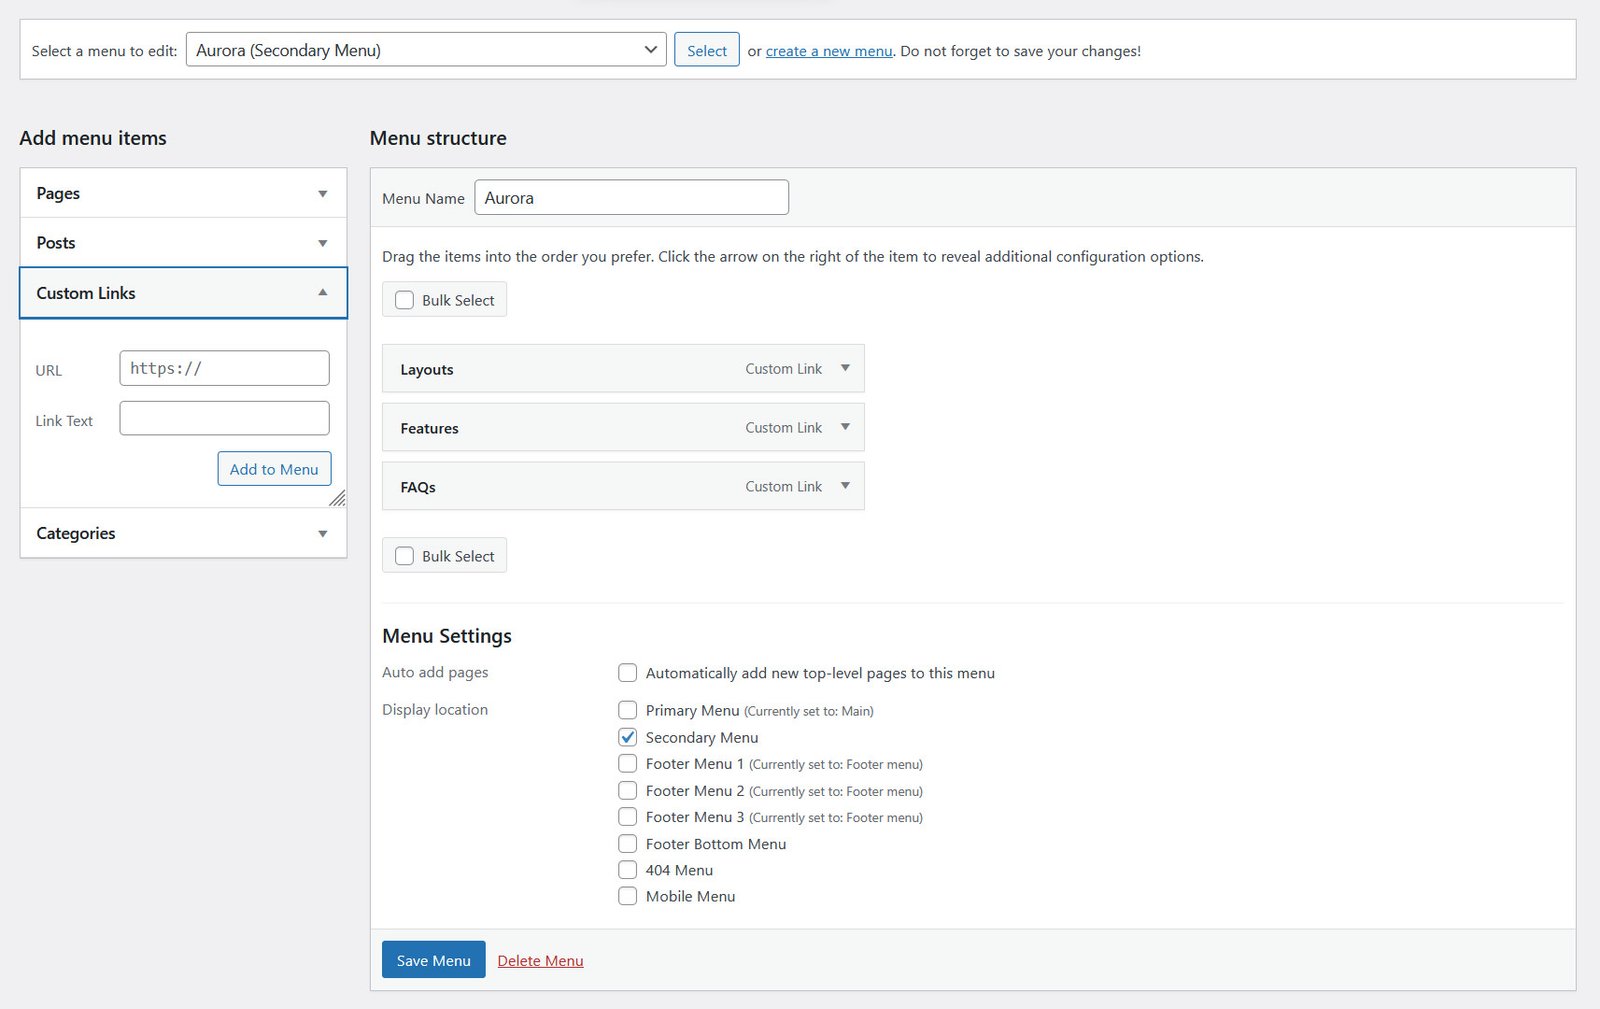
2. Create and assign your menus
Aurora provides multiple menu locations across its header and footer layouts, but none of them will show navigation until you assign a menu to them.
Go to Appearance, then Menus. Create your main navigation menu first and add the pages, categories, or links you want to include. Then scroll down to the Menu Settings section and tick the location you want this menu to appear in. Repeat the process for any secondary navigation locations Aurora provides, such as a secondary header menu or footer navigation.
If a header location appears empty in your site preview, an unassigned menu is almost always the reason.
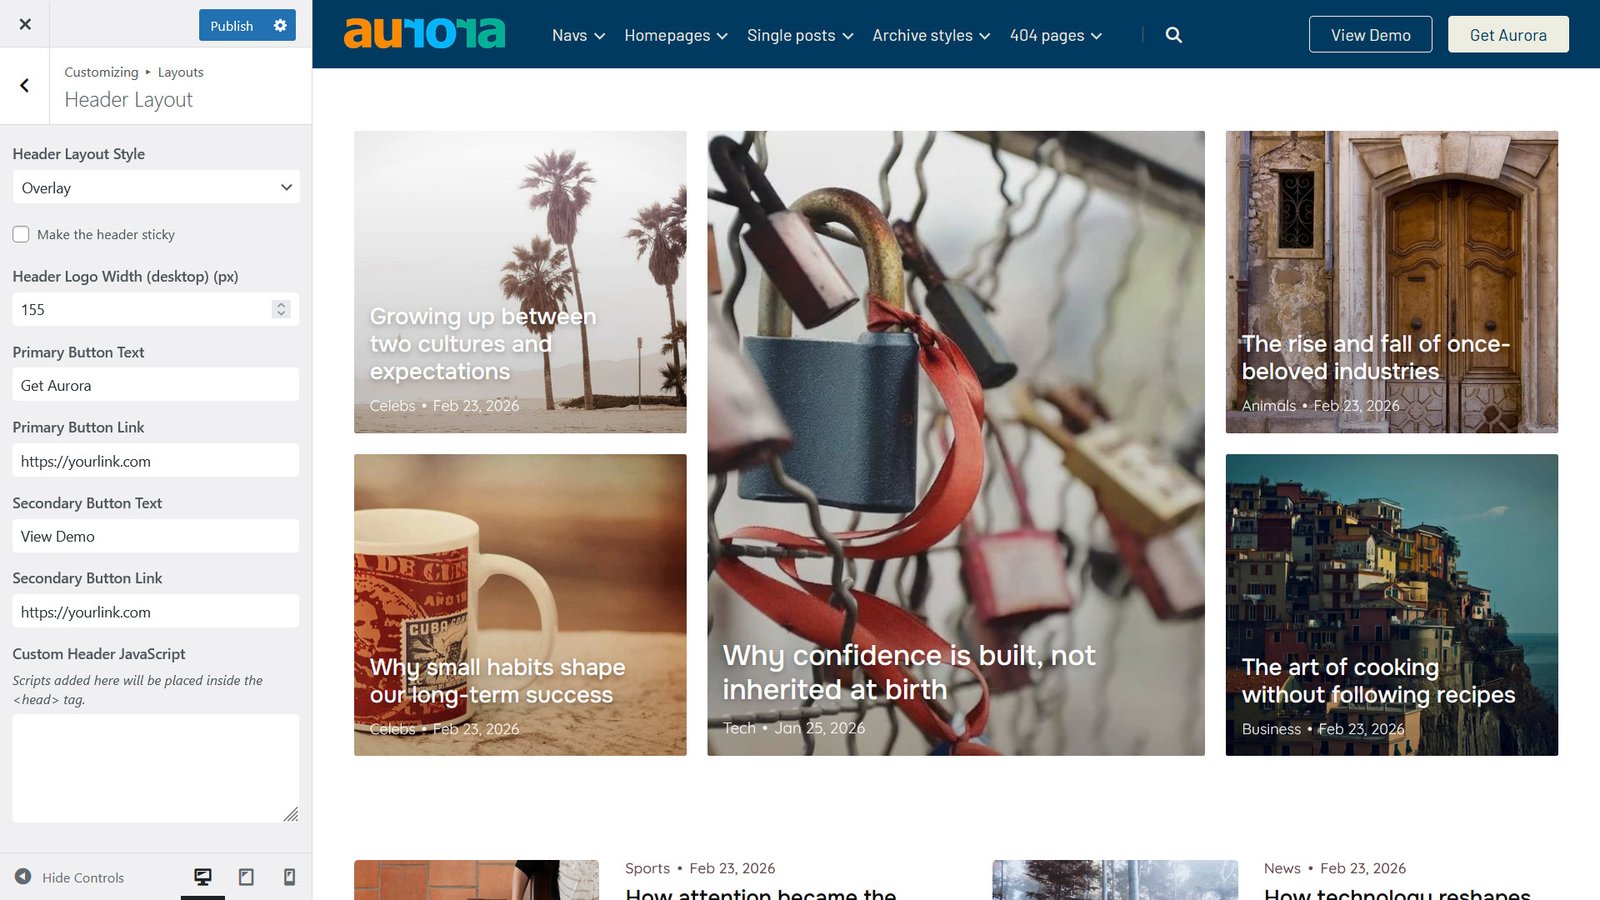
3. Add your header button text and link
Several of Aurora’s header layouts include one or two call-to-action buttons, but these won’t appear until you give them something to say and somewhere to go.
Open the Customizer, click on Layouts, navigate to Header settings, and look for the button fields. Add your button text (something like ‘Start Here,’ ‘Work With Me,’ or ‘Subscribe’) and the URL you want it to point to. Save, and the button appears immediately in your header.
4. Fill in your contact details and social links
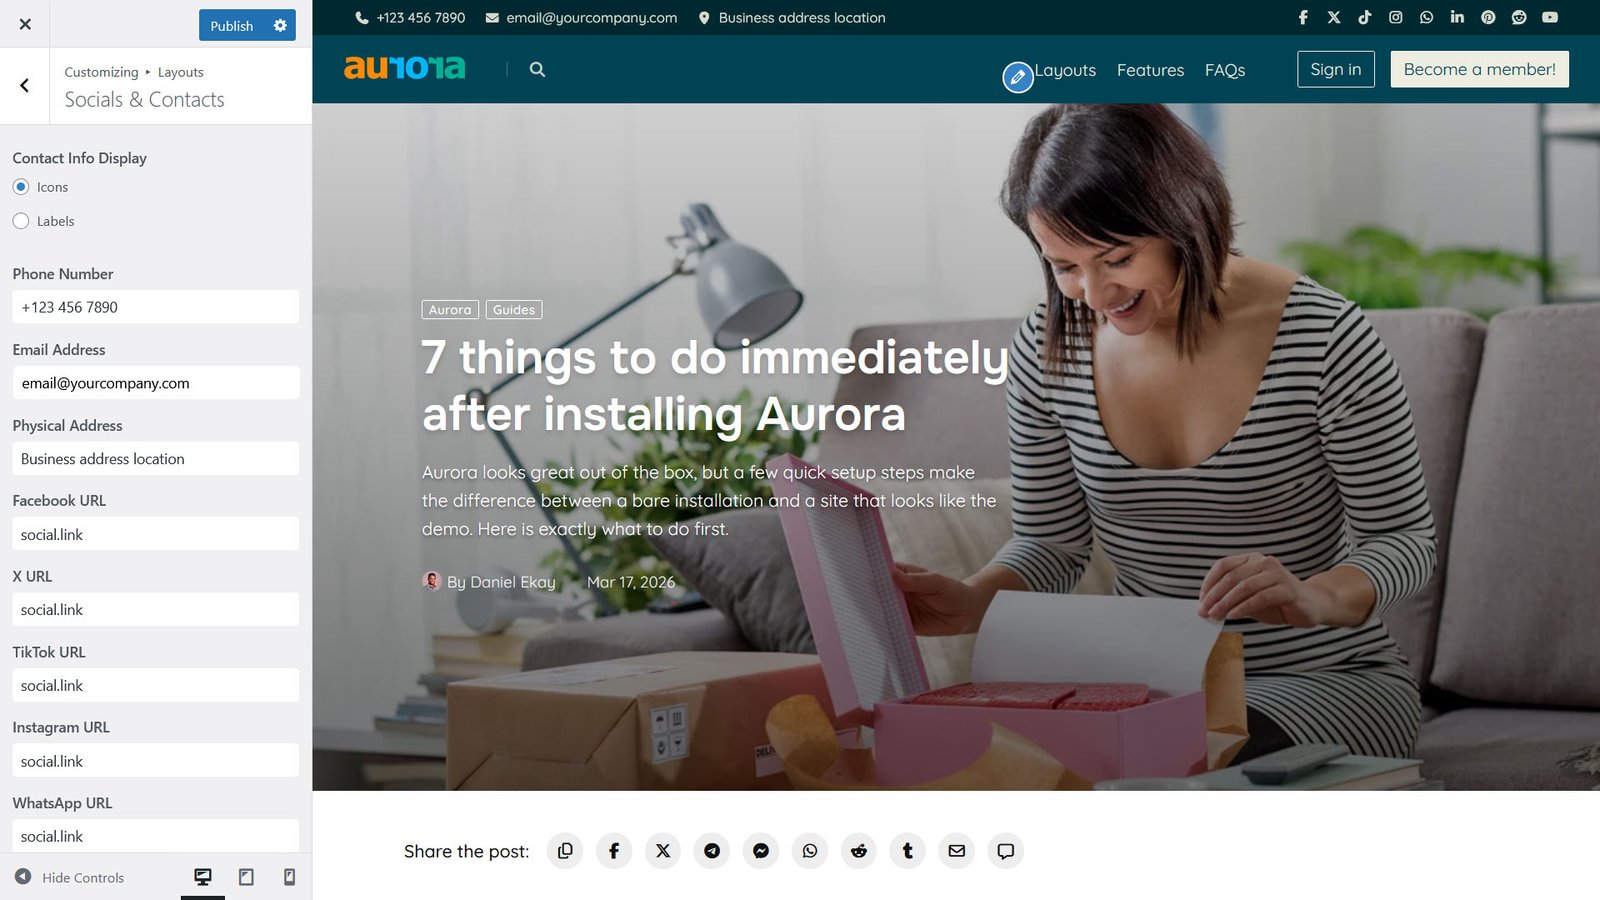
Aurora’s header designs are built to display social icons, contact information, or both, depending on the layout you choose. If your chosen header style includes space for these details, filling them in makes an immediate difference to how complete the header looks. Headers where the fields are left empty look like something is missing, because something is.
Go into the Customizer, then Layouts, then Socials & Contacts and find the fields for contact details and social links. Add your email address, phone number if relevant, location, and links to every social profile you want to display. These feed directly into your header and make an immediate visual difference, especially on the more detailed header layouts.
Social links are available in all footer layouts, but you'll need to enable them in the Customizer's footer settings before they appear. In the header, their visibility depends on your chosen header style.
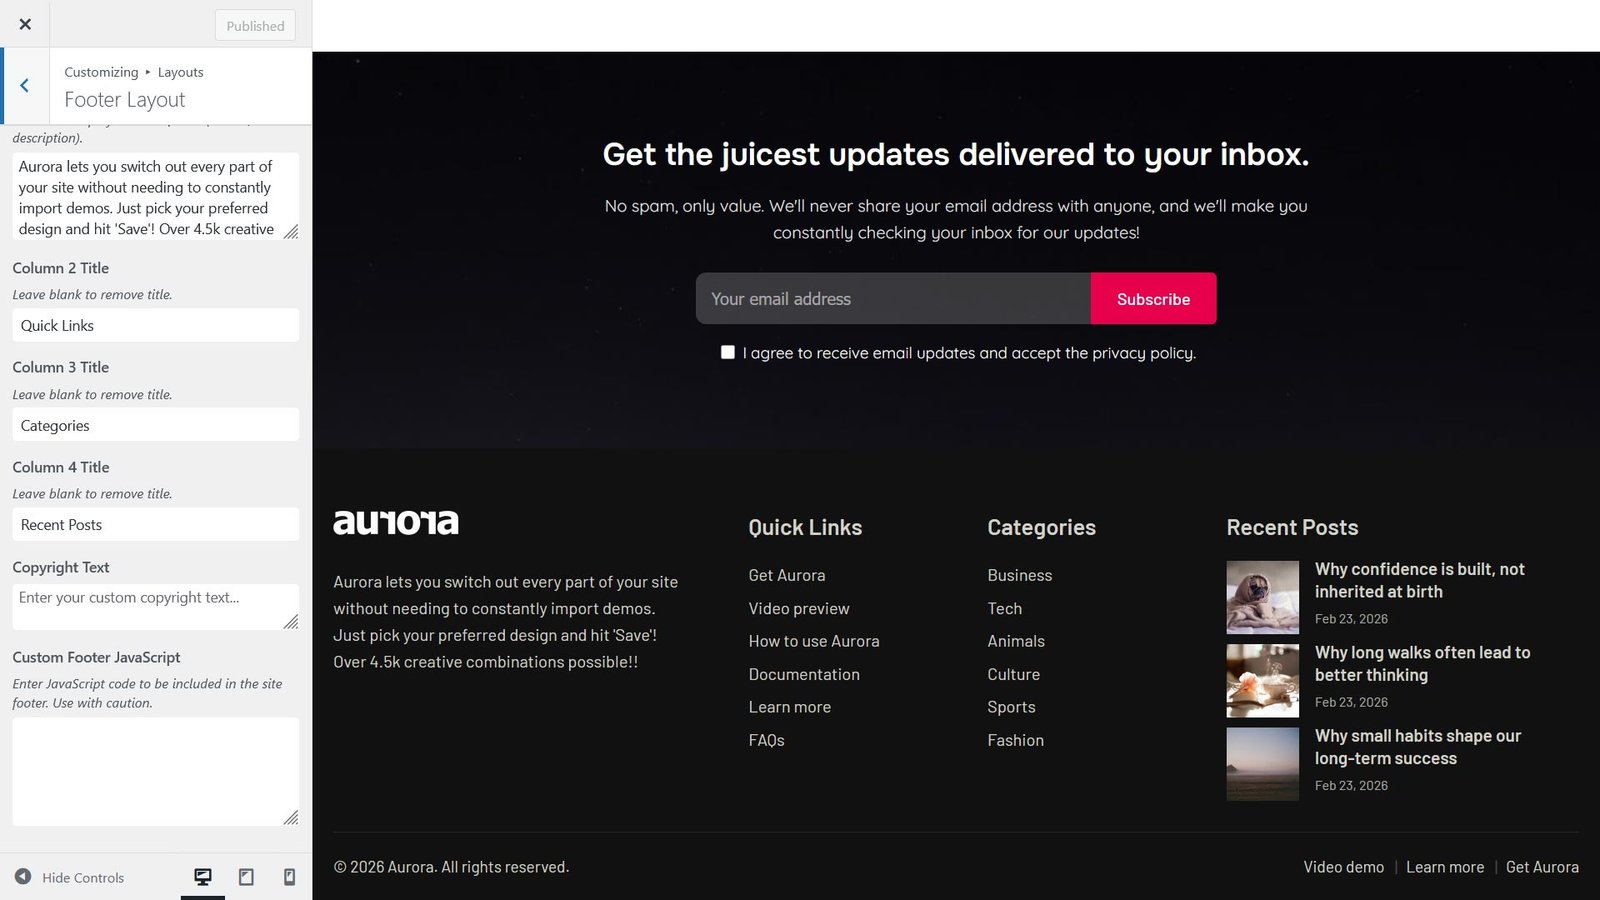
5. Set up your footer columns and bio
Aurora’s footer layouts include column areas for links, text, or widgets, plus a space for a site bio or about blurb. Left empty, the footer looks sparse. Filled in, it anchors the page properly and gives readers somewhere to go when they reach the bottom.
Open the Customizer, navigate to Layouts, then click on Footer Layout. Add a short bio or site description in the bio field, then work through the column areas and add titles to each one. Also remember to write your custom copyright text if you don’t want the default version.
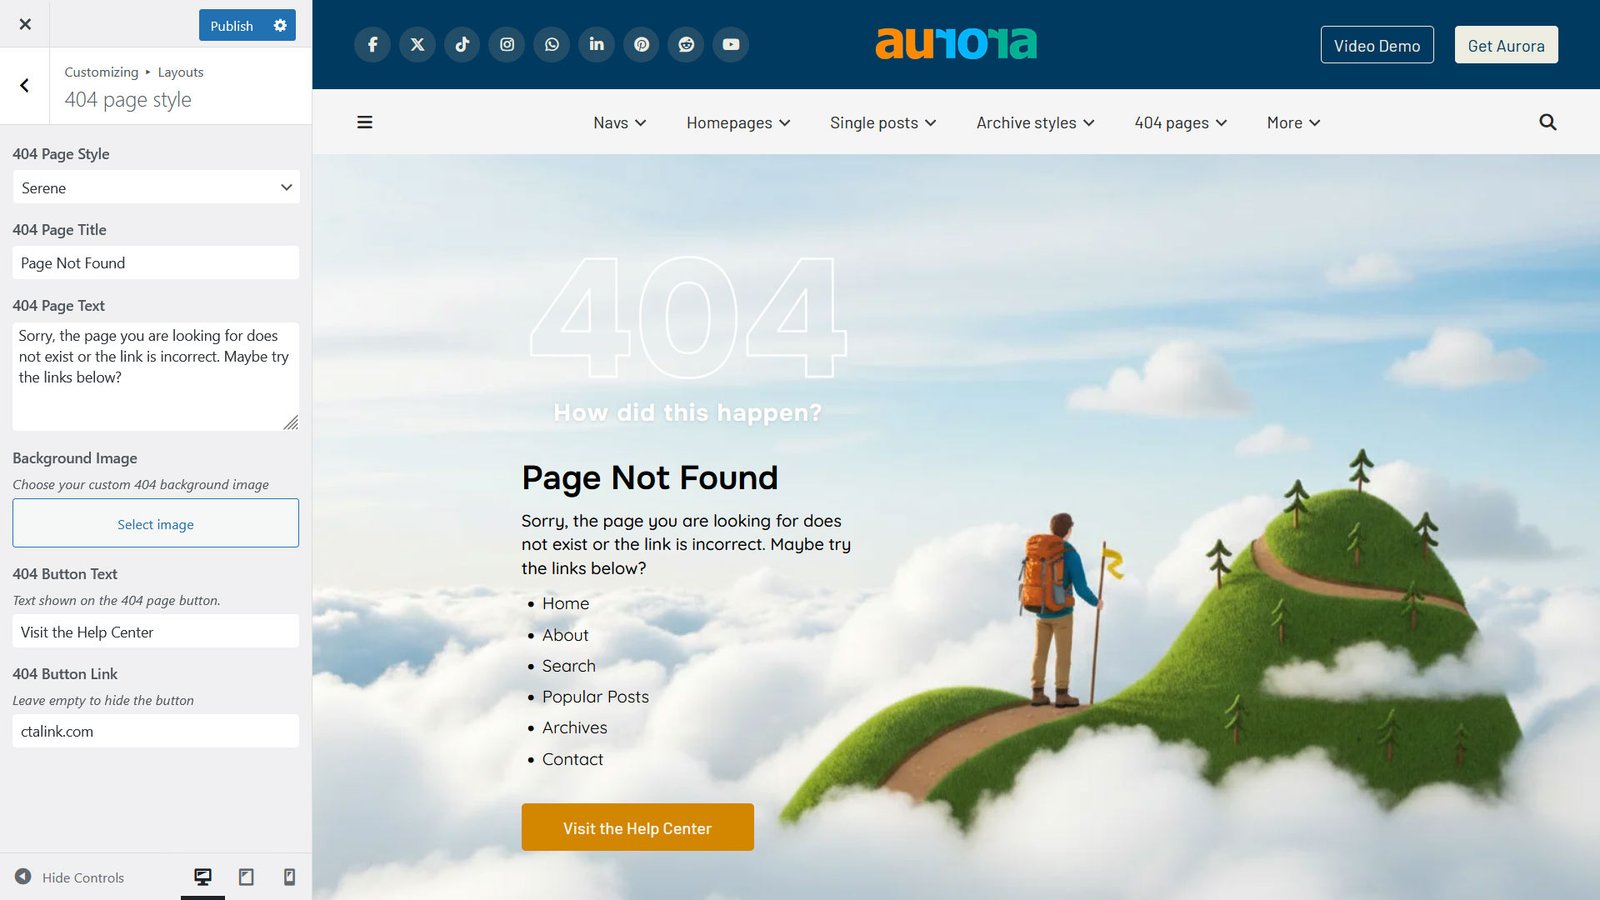
6. Set your 404 page button
Aurora includes five 404 page designs, and each one features a button to guide lost visitors back to somewhere useful. The button text and destination link both need to be set manually.
In the Customizer, under Layouts, navigate to 404 Page Style. Find the 404 settings and add your button text (something like ‘Take Me Home or ‘Browse Posts’) and the URL it should point to. Your homepage URL is the sensible default, but a popular category page or your best content works just as well.
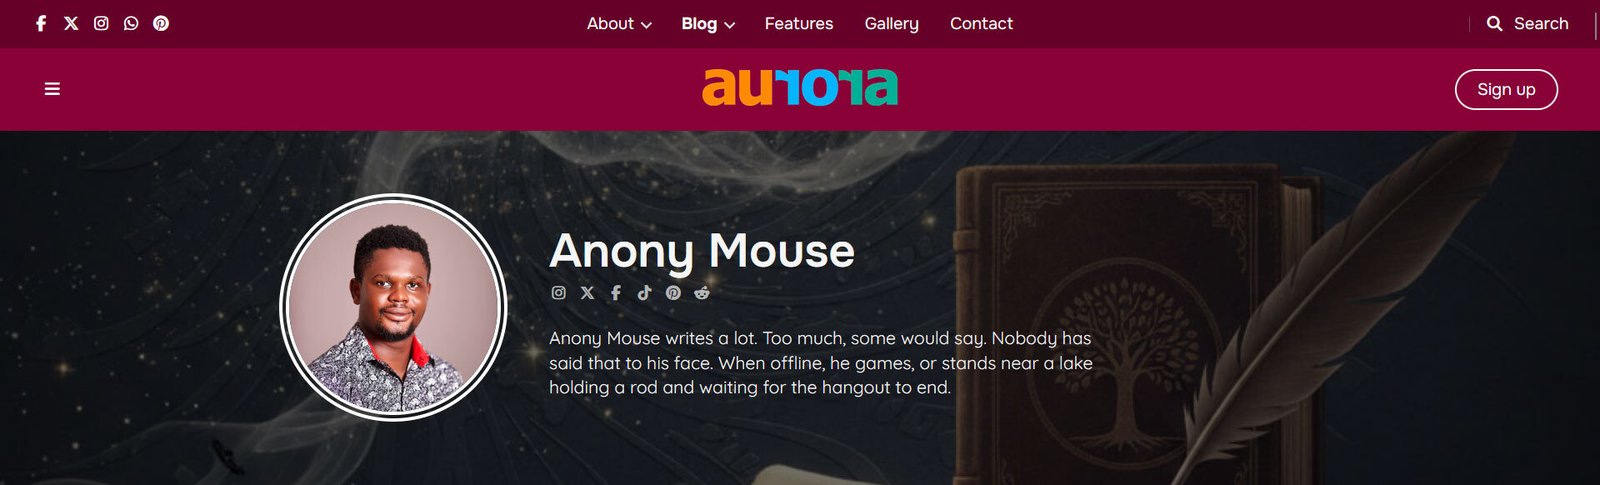
7. Complete your author profile
Every single post layout displays an author bio section below posts, and Aurora pulls that information directly from your WordPress user profile. If the profile is empty, the author section either looks bare or doesn’t show useful information.
Go to Users, then Profile in your WordPress dashboard. Fill in your biographical info, then add links to your social accounts so readers who enjoyed your post have somewhere to find more of you. These links are displayed on every single post you publish and on your author page.
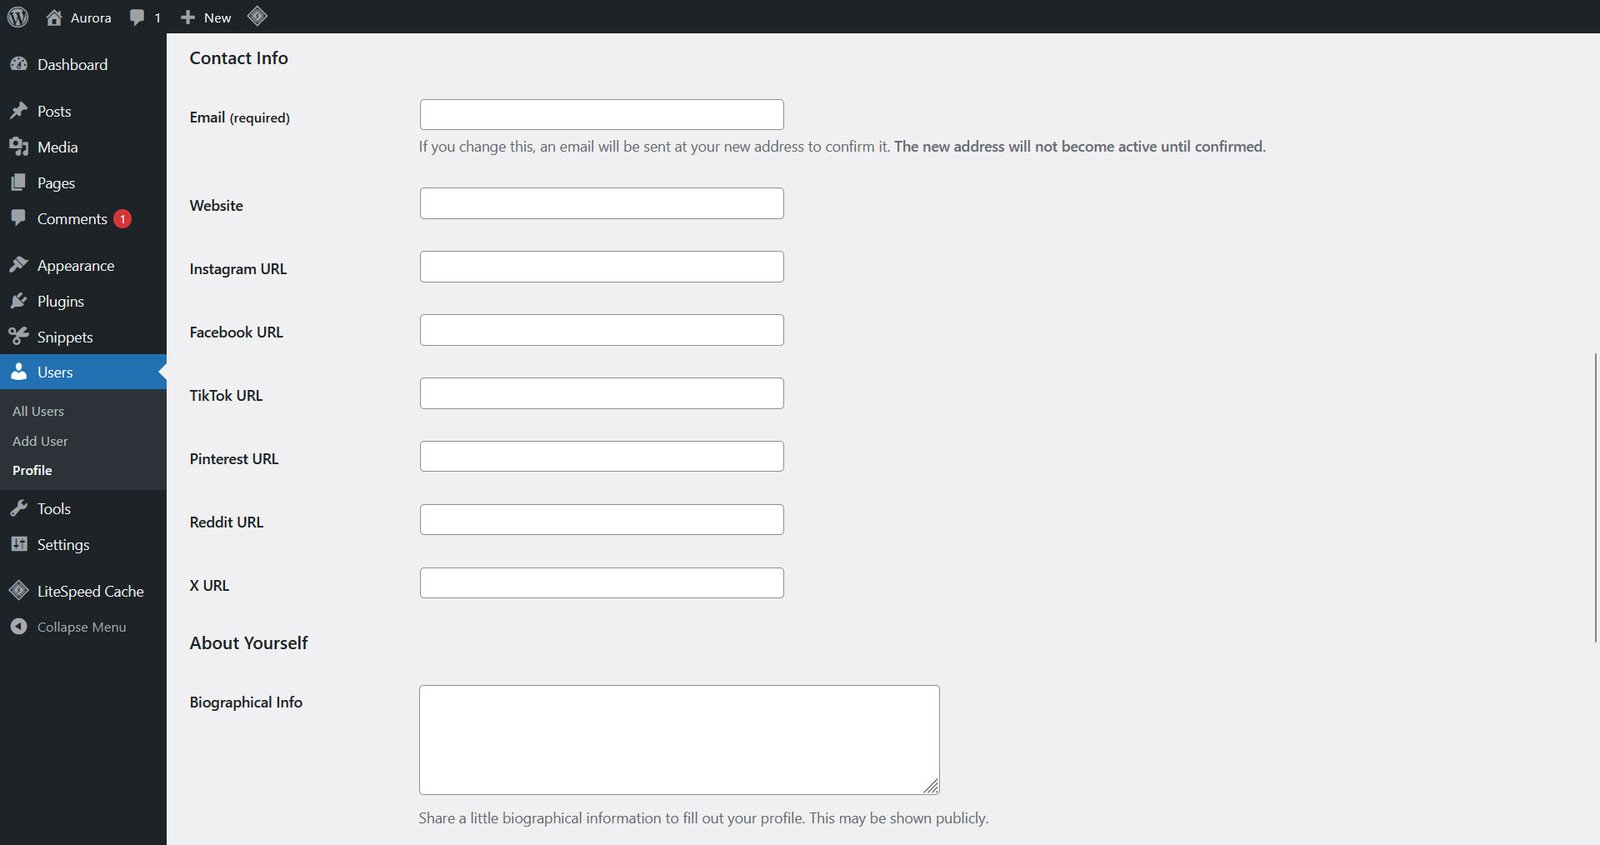

Other plugins might add extra fields to your profile in the WP admin page. Note that Aurora only adds and displays Instagram, Facebook, TikTok, Pinterest, Reddit, and X (Twitter) icons and links.
Everything else is already working
Once you’ve been through these seven steps, Aurora is fully set up. Your layouts, typography, colours, archive styles, and single post designs all work out of the box through the Customizer. There are no required plugins, no dummy content to delete, and no hidden configuration steps waiting to trip you up.
From here, the Customizer is your home base. Pick your homepage layout, choose your archive style, set your single post design, and adjust colours and fonts to match your brand. Every change previews live before it goes public.
If you haven’t explored the full range of layout options yet, the live demo shows every combination available. Everything you see there is accessible from your own Customizer on day one.