

Last updated:
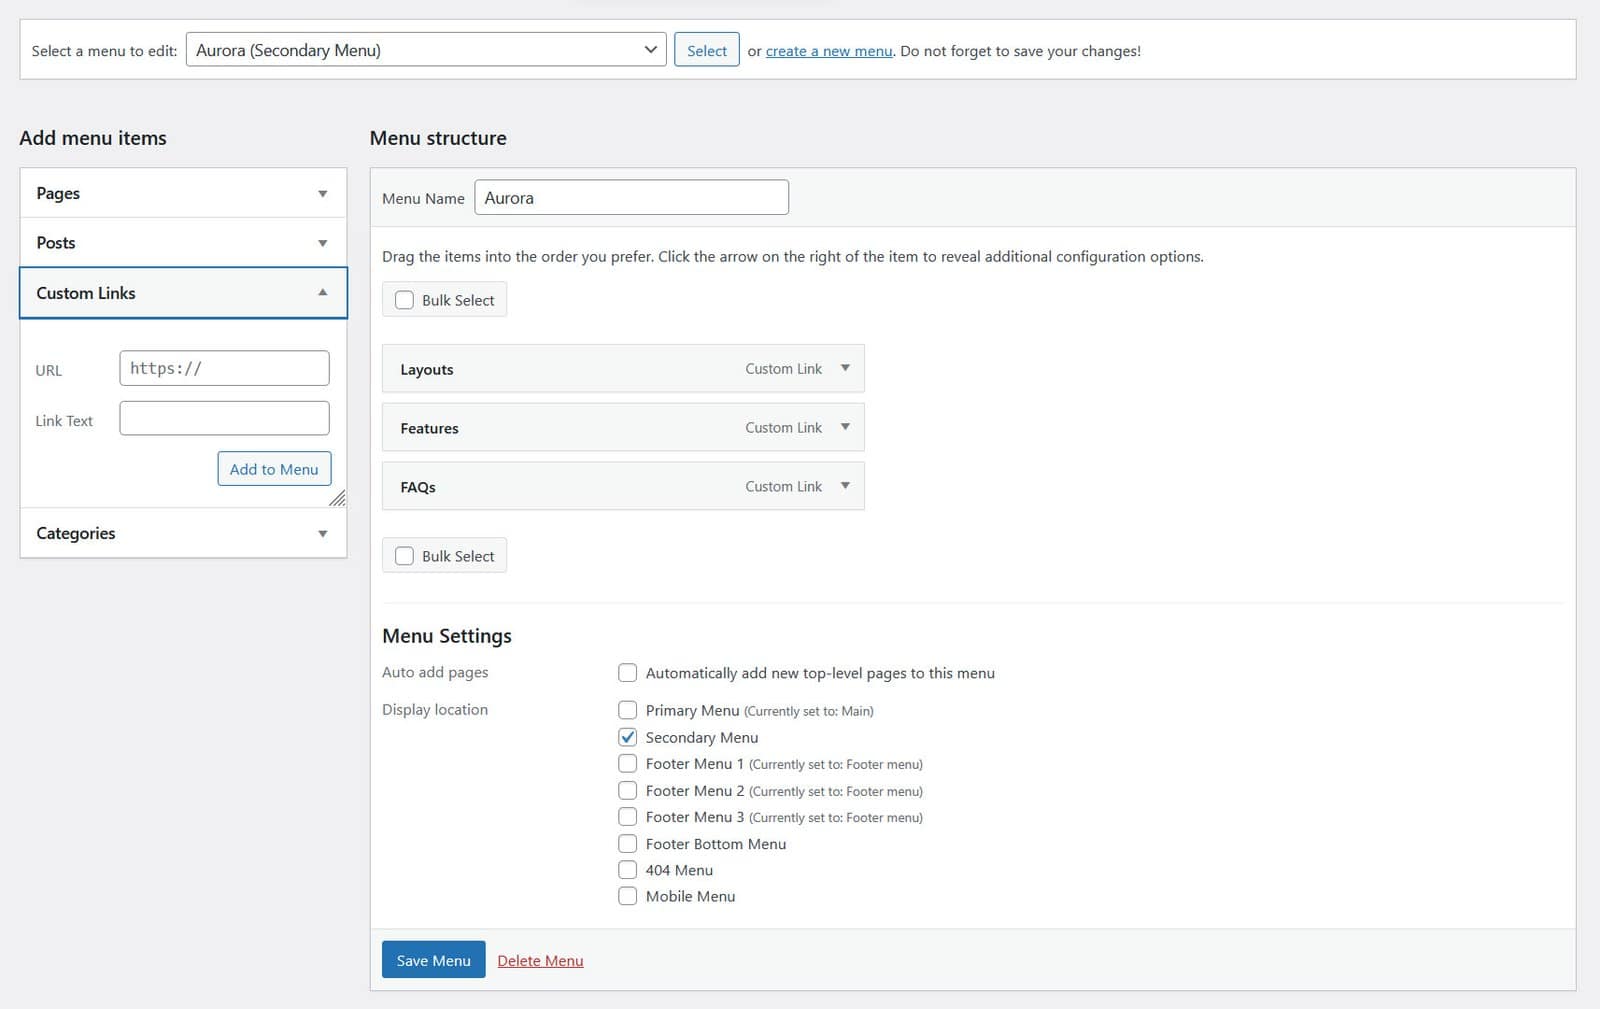
Aurora registers eight menu locations. Each one is a slot in the theme where a WordPress menu can be assigned. You create the menu in Appearance → Menus, then assign it to a location. The theme takes care of rendering it in the right place.
All Menu Locations
| Location | Where it appears |
|---|---|
| Primary Menu | The main navigation in the header, shown on all header layouts |
| Secondary Menu | Appears inside the hamburger-triggered panel on Apex, Overlay, and Vanilla headers |
| Mobile Menu | The navigation inside the mobile drawer. If unassigned, the Primary Menu is used instead. |
| Footer Menu 1 | First column of footer navigation links |
| Footer Menu 2 | Second column of footer navigation links |
| Footer Menu 3 | Third column of footer navigation links |
| Footer Bottom Menu | A slim link row in the very bottom strip of the footer |
| 404 Menu | Navigation shown on the 404 page only |
How to Assign a Menu to a Location
- Go to Appearance → Menus.
- Select an existing menu or create a new one.
- Under Menu Settings → Display location, check the location you want to assign it to.
- Click Save Menu.
You can also manage location assignments from the Manage Locations tab at the top of the Menus screen.
Notes
- The Secondary Menu only appears on Apex, Overlay, and Vanilla, inside a panel that opens when the hamburger icon is clicked. On other header layouts, the location has no visible effect.
- Footer menu columns only appear on footer layouts that include a menu area. The Stripped footer layout does not include columns.
- For header menu locations, a location with no menu assigned simply renders nothing. For footer menu columns, the column space remains in the layout even without an assigned menu, so the surrounding columns do not shift to fill the gap.