
Aurora Quick Start: Install, Activate, and Set Up in 10 Minutes
 By Daniel Ekay
•
May 18, 2026
•
By Daniel Ekay
•
May 18, 2026
•
This guide walks you through everything you need to get Aurora running on your WordPress site, from installing the theme to choosing your first layouts. If you follow these steps in order, you will have a fully functional, styled blog in under ten minutes.
What You Need Before You Start
- A WordPress site running WordPress 6.0 or later
- PHP 8.0 or later on your server
- Your Aurora ZIP file (downloaded from your purchase confirmation email) or your trial download link
- Admin access to your WordPress dashboard
If you are not sure which PHP version your server is running, go to Tools → Site Health → Info → Server in your WordPress dashboard. The PHP version is listed there.
Step 1: Install Aurora
- Log in to your WordPress dashboard.
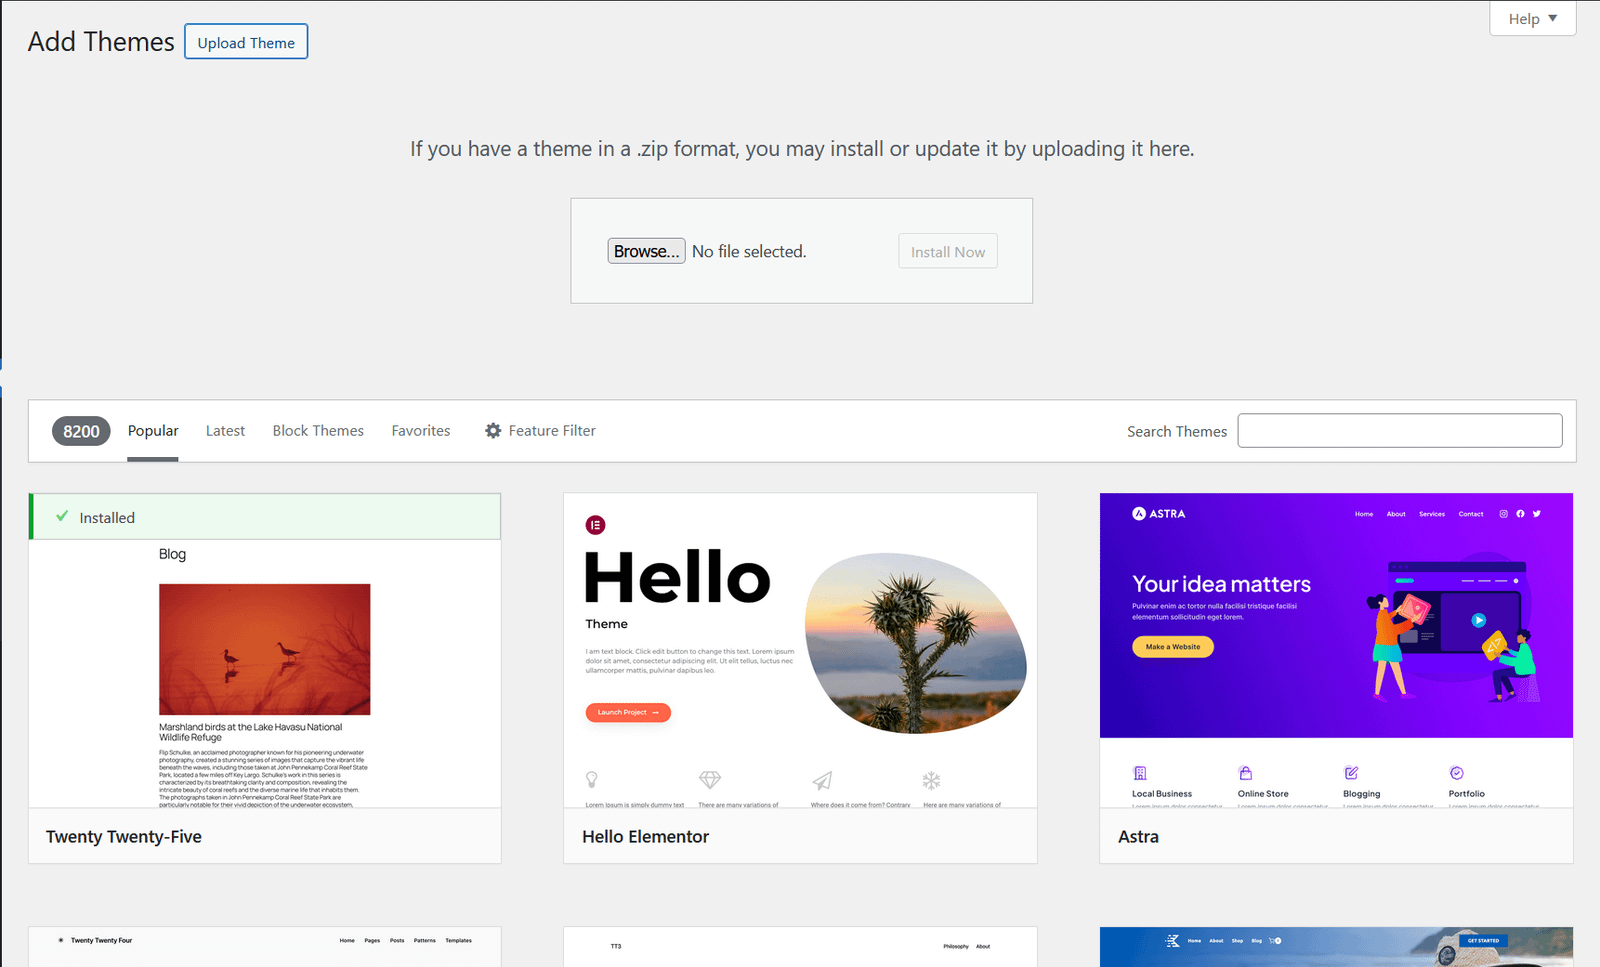
- Go to Appearance → Themes.
- Click Add New Theme, then click Upload Theme.
- Click Choose File and select the Aurora ZIP file you downloaded.
- Click Install Now.
- Once the installation completes, click Activate.
Aurora is now your active theme. Your site is already using Aurora’s default layouts and styles.
Step 2: Activate Your License
A valid license unlocks all of Aurora’s layouts and keeps the theme receiving updates. Without it, Aurora falls back to default layouts on every page.
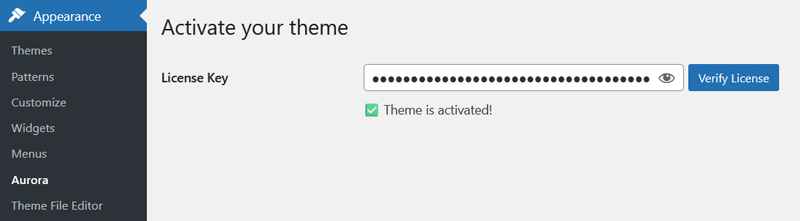
- In your WordPress dashboard, go to Appearance → Aurora.
- Paste your license key into the field. You will find it in your purchase confirmation email.
- Click Verify License.
- The status should change to Active.
For full details on license activation and troubleshooting, see Activate Your License.
Not sure which layouts to pick? The Customizer Overview explains what every panel does and is a good place to start.
Step 3: Assign Your Menus
Aurora will show an admin notice at the top of your site if no menu is assigned to the Primary Menu location. Setting this up first avoids that.
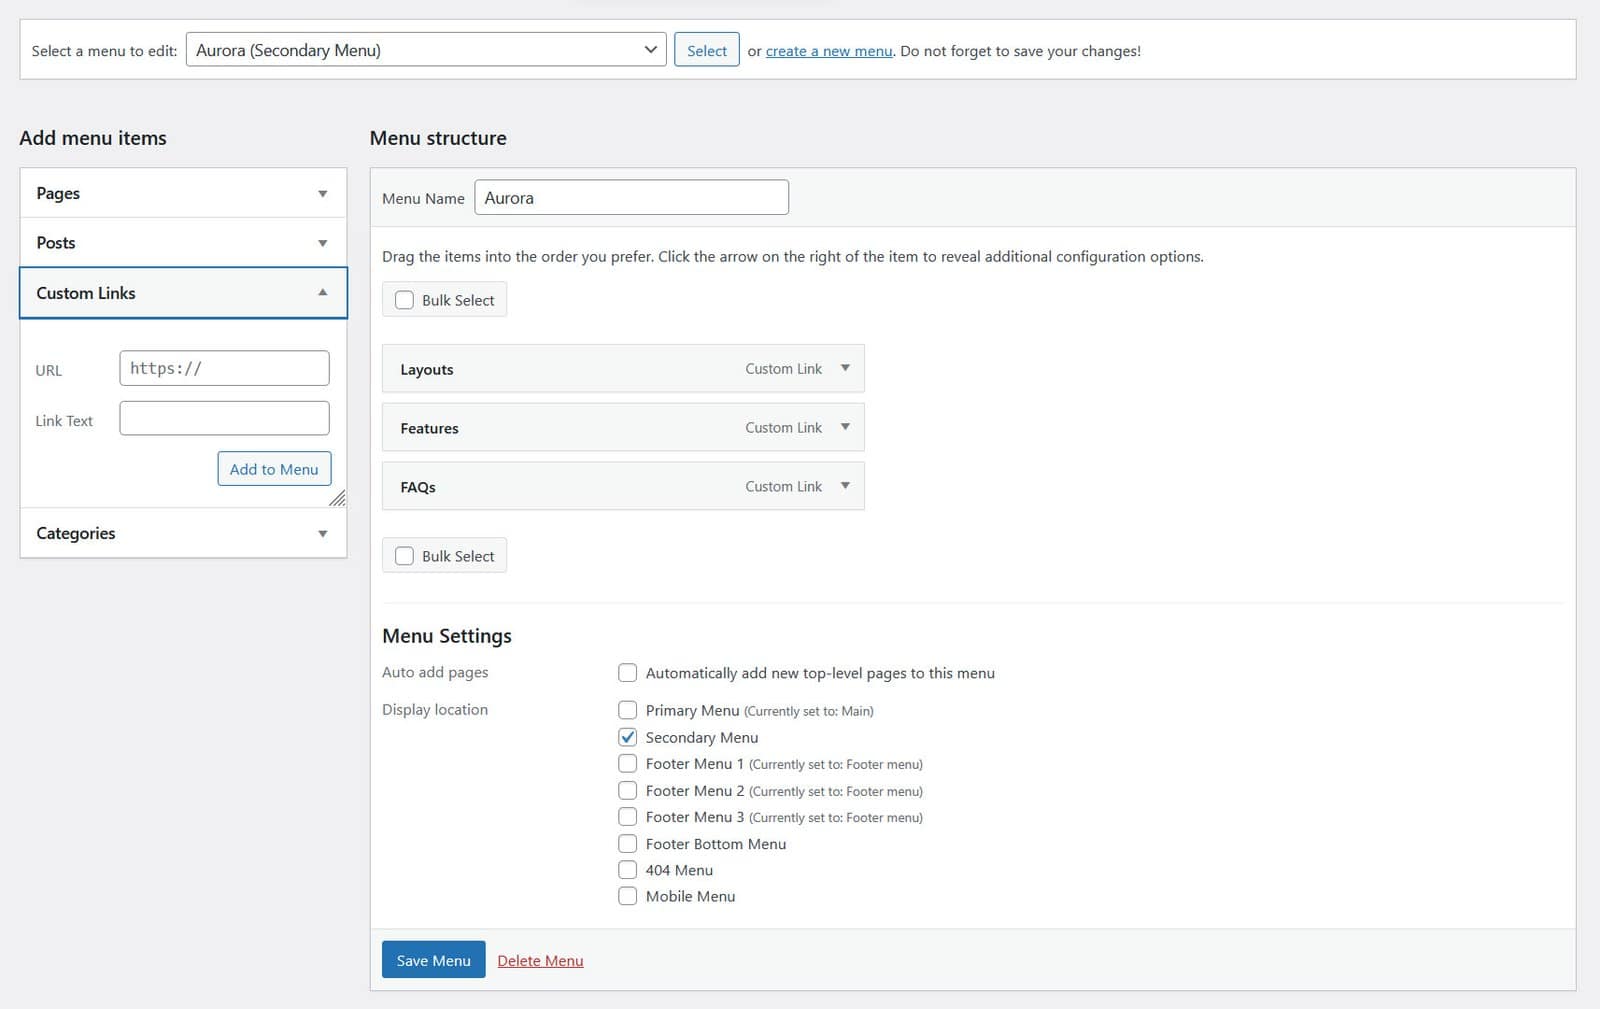
- Go to Appearance → Menus.
- Create a new menu or select an existing one.
- Under Menu Settings, check Primary Menu and save.
Aurora also supports a Mobile Menu location. If you want a separate navigation for mobile devices, create a second menu and assign it to the Mobile Menu location. If no mobile menu is assigned, Aurora uses the primary menu on mobile automatically.
For a full walkthrough, see Assign Your Menus.
Step 4: Add Your Logo
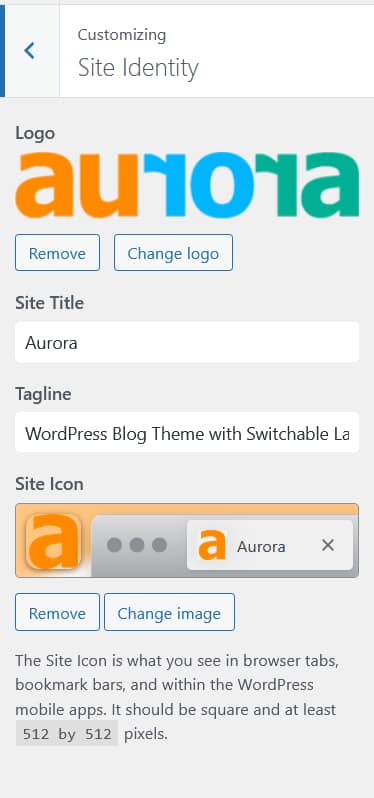
- Go to Appearance → Customize.
- Open the Site Identity panel.
- Click Select logo and upload your logo image.
- Click Publish.
Aurora displays your logo in the header and footer automatically. You can control the logo width for desktop, tablet, and mobile independently from Customize → Layouts → Header Layout and Customize → Layouts → Footer Layout. Just click the device-view toggle to access the settings.
Step 5: Choose Your Header Layout
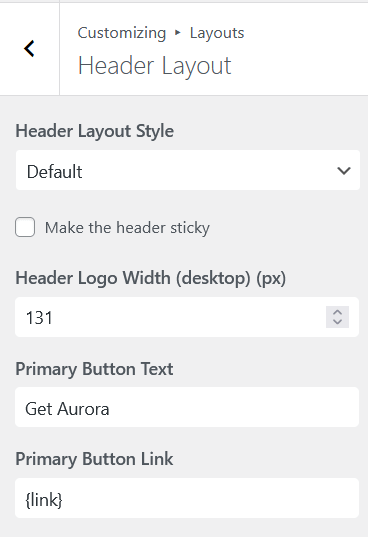
- In the Customizer, open Layouts → Header Layout.
- Use the dropdown to select a header. Aurora ships with 8 header layouts: 6 horizontal bar designs and 2 vertical side-panel designs.
- The live preview on the right updates instantly as you switch between options.
- When you have found one you like, move on without publishing yet. You can publish everything at the end.
Not sure which to pick? Vanilla is the cleanest minimal option. Detailed and Elegant work well for sites that display contact info or social links in the header. Upright and Thin are vertical side-panel headers suited to editorial and portfolio-style blogs.
Step 6: Choose Your Homepage Layout
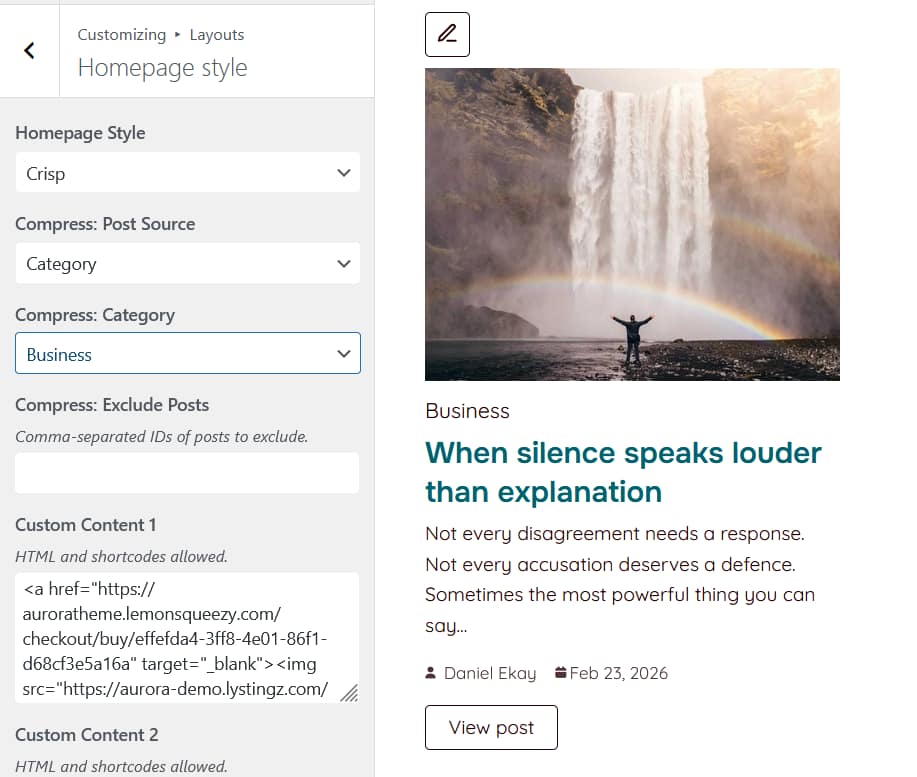
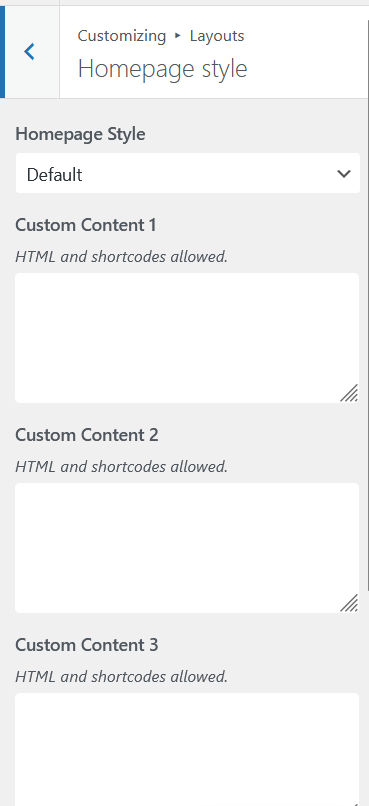
- In the Customizer, open Layouts → Homepage Style.
- Select a layout from the dropdown. Aurora ships with 5 homepage layouts, each a different arrangement of post sections.
- Watch the live preview update as you switch.
Each homepage layout pulls posts from configurable sources: a category, a tag, handpicked posts, or all recent posts. You can configure those sources in the Post Source field after picking a layout.
Step 7: Choose Your Single Post and Archive Layouts
- Open Layouts → Single Post Layout and select a layout. Aurora ships with 10 single post layouts.
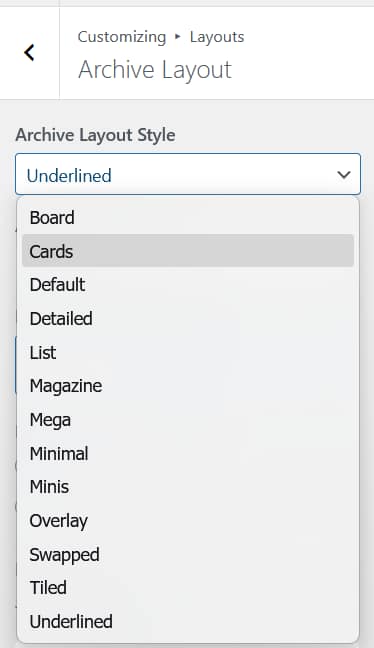
- Open Layouts → Archive Layout and select a layout. Aurora ships with 13 archive layouts.
These two layouts cover the pages your readers will spend the most time on: individual posts and category or tag archives. Both update live in the preview.
Step 8: Choose Your Footer Layout
- Open Layouts → Footer Layout and select a layout. Aurora ships with 5 footer layouts.
- While in this panel, fill in your footer bio text, configure your footer menu columns, and toggle social icons on or off.
Step 9: Set Your Colors and Fonts
Aurora gives you full color and typography control from the Customizer. At minimum, set these before publishing:
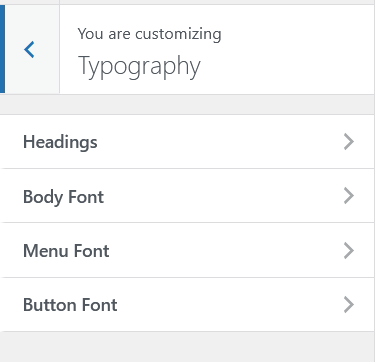
- Customize → Colors → Link Color: sets your primary accent color used for links and interactive elements across the theme.
- Customize → Colors → Button Background Color: sets the color of CTA buttons across the site.
- Customize → Typography → Body Font: sets the base font for all post and page content.
Every color and font change previews live. You do not need to publish after each change. Make all your adjustments and publish once at the end.
Step 10: Publish
Click Publish in the top left of the Customizer. All of your layout choices, colors, fonts, and settings go live at once.
Your Aurora site is now live.
What to Do Next
Now that the basics are in place, here are a few things worth setting up:
- Social links: add your social media profiles under Customize → Socials & Contact so they appear in your header and footer
- Homepage sections: configure what posts each section on your homepage pulls from under Customize → Layouts → Homepage Style, then click the pencils.
- 404 page: set a custom title, message, and navigation menu for your 404 page under Customize → Layouts → 404 Page Style.
- Newsletter: if you have a newsletter, paste your embed code into Customize → General Settings to add a signup section above your footer.
If anything is not working as expected after installation, check that your license is active and that your PHP version meets the minimum requirement. For anything else, reach out at aurora@lystingz.com.